jueves, 28 de diciembre de 2006

Meantime

Okay, well, it appears that I was a little optimistic when I said, “I’ll see you next week.” Lo and behold, next week is officially here, but I’m still busy with California, Dungeness crab, sweet potato biscuits, cranberry upside-down cakes, cousins, and that kind of stuff.


So much fun - and so much eating - can keep a girl pretty well occupied.


I hope you won’t mind if I say that I’ll see you next week instead. I promise to come back with some big news for the New Year. I hope you’ll stop by.

In the meantime, be well - and well occupied with all sorts of wonderful things.

lunes, 18 de diciembre de 2006

The best thing since Brussels sprouts

Friends, grab a stash of cookies and pull up a chair, because we have to talk.

I’m a little funny about heavy cream. This probably makes me a total killjoy, but I can’t help it. My mother is this way too, so maybe I get it from her. Cream soups and sauces upset her stomach, and by some sort of sad, unlucky inheritance, the same goes for mine. By way of illustration, take the tragic case of the velouté de potimarron - a velvety pumpkin soup - that I once ordered at a bistro in Paris. As soon as it arrived at the table, I knew I was doomed: it coated the spoon like clotted cream, and its color tended more toward white than any shade of winter squash. I took three bites before my stomach did a flip-flop. Of the remainder of the evening, the only good thing I remember is the man sitting next to me, who leaned into my ear and breathed, en français, “You remind me of Cleopatra.” (I was hitting the smoky, kohl-black eye makeup pretty hard back then.) For a pale-skinned, blue-eyed American girl with red hair, that was dreamy. The cream in that soup, however, was not.

As a kid, the only form of cream I knew well was the whipped kind, beaten in a chilled bowl with a dribble of vanilla and served alongside dessert. I also knew that my dad sometimes sneaked into the kitchen late at night to eat a bowl of cereal doused in heavy cream, but it seemed to me horribly decadent, if not flat-out wrong. Gah. Maybe something is wrong with me. For whatever reason - my genes, my stomach, my stodgy inner Puritan - I’m just not one to go throwing around cream. I hardly ever cook with the stuff. I’m a real drag. I do like a bowl of ice cream, and a good gratin, but otherwise, eh.

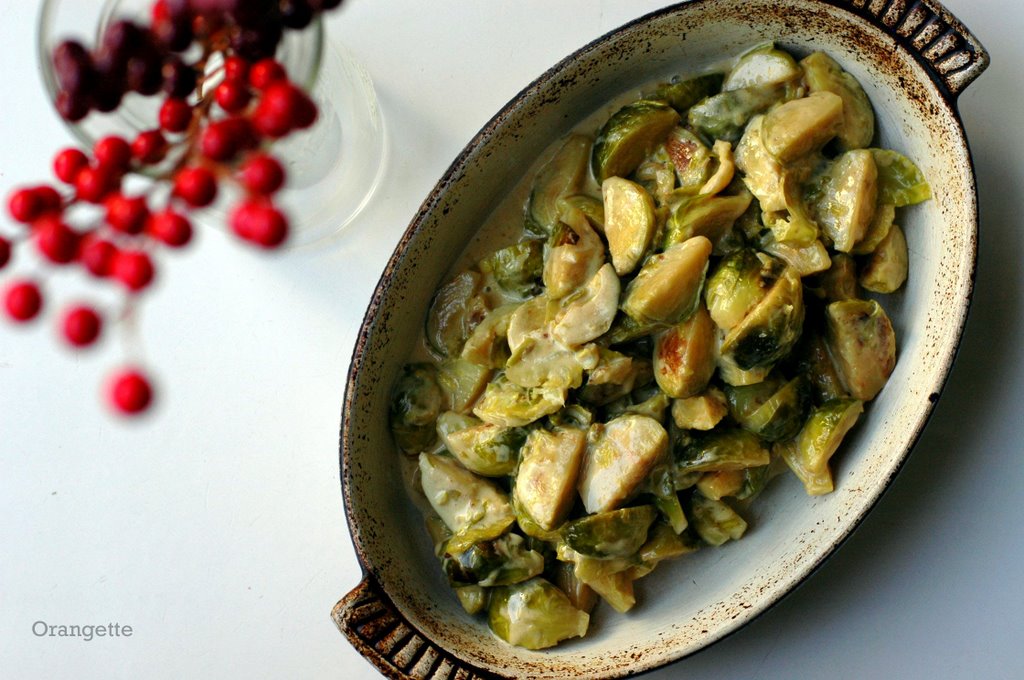
But if ever there were an occasion to make me change my tune, cream-wise, it’s upon us. The holidays make us all feel a little kinder, I find, and a little more generous with others, with ourselves, and with our measuring cups. This Christmas, I plan to be very kind and generous with my Brussels sprouts. I plan to give them a whole cup of cream.
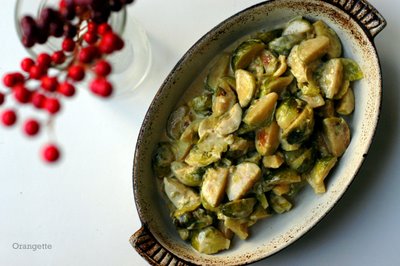


I don’t know what’s gotten into me, but I love this recipe. My stomach literally coos like a baby at the thought of it. I could lap up a plate of this stuff like a cat with a bowl of milk. You know the old saying, “It’s the best thing since sliced bread”? Well, forget about the bread: from now on, cream-braised Brussels sprouts are the standard to be bested. Please say hello to my new favorite holiday side dish.

Were I not such a sucker for Brussels sprouts, I probably never would have considered such a creamy, nervy creation. The Brussels sprout may be a homely little thing, all green at the gills and hard-headed, but it’s bewitching. If you’ve ever tried it hashed with poppy seeds and lemon, you’ll know what I mean. Today’s recipe, adapted from my cool-weather bible All About Braising, is about as bewitching as it gets. It also happens to be righteously easy, which leaves plenty of time for fussing over your Christmas roast, your sweet potato biscuits, or that punch bowl of boozy egg nog. You could even prep the sprouts a day ahead: rinse, trim, and quarter them, and then stash them in a sealed plastic bag with a damp paper towel. Thirty minutes before dinnertime, get out the skillet and fire up the stove. From there, the sprouts cook themselves, shaking off their tough, bitter crunch in Jacuzzi bath of cream. They emerge completely relaxed, fork-tender, loosely cloaked in an ivory glaze, their pungency diffused by butterfat and a slow, patient braise.

I know I once said that the hashed sprouts recipe was the one to win over skeptics, but actually, I lied: this is even better. The cream coaxes forth the Brussels sprout’s inherent sweetness and fills the kitchen with a rich, nutty, warming aroma that could make even the toughest of men purr like kittens. [Go on, tell em, Brandon.] Just thinking about it makes me want to go fix myself a bowl of cereal and pour some cream on top.

Happy holidays, everyone. May they be filled with cookies, Brussels sprouts, and the people you love. We’re headed to San Francisco with a suitcase full of goodies, and I’ll see you next week.


Cream-Braised Brussels Sprouts
Adapted from All About Braising

First things first: buy good sprouts. They should feel firm and have tight, shiny-edged leaves. I like to buy medium-size ones, with heads that measure, say, 1 to 1 ¼ inches in diameter. You could buy littler ones, if you like, but don’t buy them any bigger. I find that the larger they are, the stronger – i.e. more bitter – their flavor. My dad used to come home from the grocery store with big, hoary, loose-leafed, air-headed sprouts, and it made me crazy. Do not do that.

These sprouts would be delicious alongside most any meat that typically graces the holiday table: beef, turkey, ham, lamb, you name it. And with a crusty hunk of bread and some cold leftover chicken, they also make for a warming Sunday lunch. We gave it a trial run just for you, and I actually had to remove the serving dish from the table to keep us from eating the whole thing.

1 ¼ lb. Brussels sprouts
3 Tbs unsalted butter
¼ tsp coarse sea salt, plus more to taste
1 cup heavy cream
1 Tbs fresh lemon juice, or more to taste

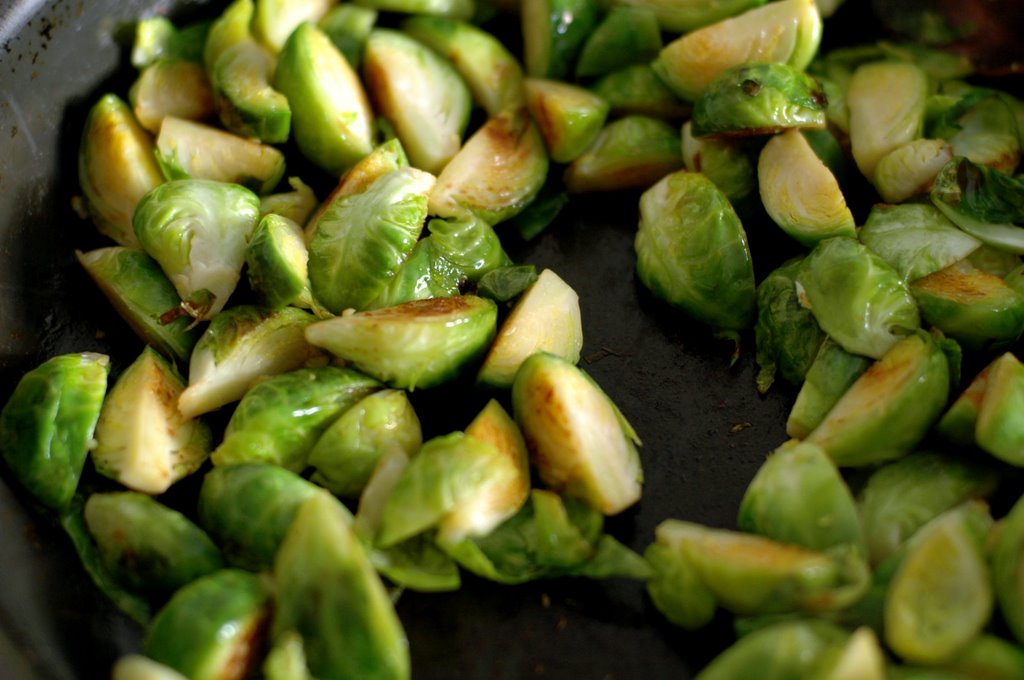
First, prep the Brussels sprouts. Trim the stem end of each sprout and pull off any ragged or nasty outer leaves. Cut the sprouts in half from stem end to tip, and then cut each half in half again. Ultimately, you want little wedges.

In a large (12-inch) skillet, melt the butter over medium-high heat. Add the Brussels sprouts and salt. Cook, stirring occasionally, until the sprouts are nicely browned in spots, about 5 minutes or so. I like mine to get some good color here, so that they have a sweetly caramelized flavor.

Pour in the cream, stir to mix, and then cover the pot. Reduce the heat to low or medium low: you want to keep the pan at a slow simmer. Braise until the sprouts are tender enough to be pierced easily with the tip of a paring knife, about 30-35 minutes. The cream will have reduced some and will have taken on a creamy tan color.

Remove the lid, and stir in the lemon juice. Taste for seasoning, and adjust as necessary. Let the pan simmer, uncovered, for a minute or two to thicken the cream to a glaze that loosely coats the sprouts. Serve immediately.

Yield: 4 to 6 servings, depending on what else is on the plate and whether or not Brandon and Molly are present.

martes, 12 de diciembre de 2006

Building blocks

I have long entertained a little fantasy about weekends: namely, that they’re fun and restful. Most of the time, in reality, I fill them with way too much stuff. This stuff could be fun and restful in theory, but when you cram it all into 48 or so hours – leaving room for sleep, of course, and for finally cleaning the bathroom – it doesn’t look much like a fantasy. Sometimes it’s even kind of stressful, a word that should never, ever be associated with Saturday or Sunday. But this past weekend, blessed be, was like Christmas come early. We had the sort of weekend I wait all week for, sans Clorox and Windex and other commitments and duties. We had champagne and homemade ice cream sandwiches by the fire. We slept until ten(!) and drove to Columbia City Bakery for sticky buns and soft pretzels. We made homebrew with two friends and ate Szechuan take-out. And oh my stars, we even went to a show. Quel weekend!

I’m not sure how I got so lucky, but I wasn’t about to monkey with things by throwing a fussy baking project into the mix. So not only did I not fuss, but hell, I didn’t even bake. I just melted, stirred, chilled, and cubed.


Oh my, are these ever ea-sy. I know I say that about nearly everything around here, but that doesn’t make it any less true. Melt a pound of dark chocolate, stir in some dried fruit and nuts, slip it in the fridge, and poof! You’ve got yourself a pan of dark chocolate candies. These are as speedy and simple as it gets - and, more importantly, they’re spoil-your-dinner good. And despite the astounding ease of their making - you could so drink a big glass of boozy egg nog and not mess them up - they look fussy enough to earn you some good, old-fashioned fussing over.

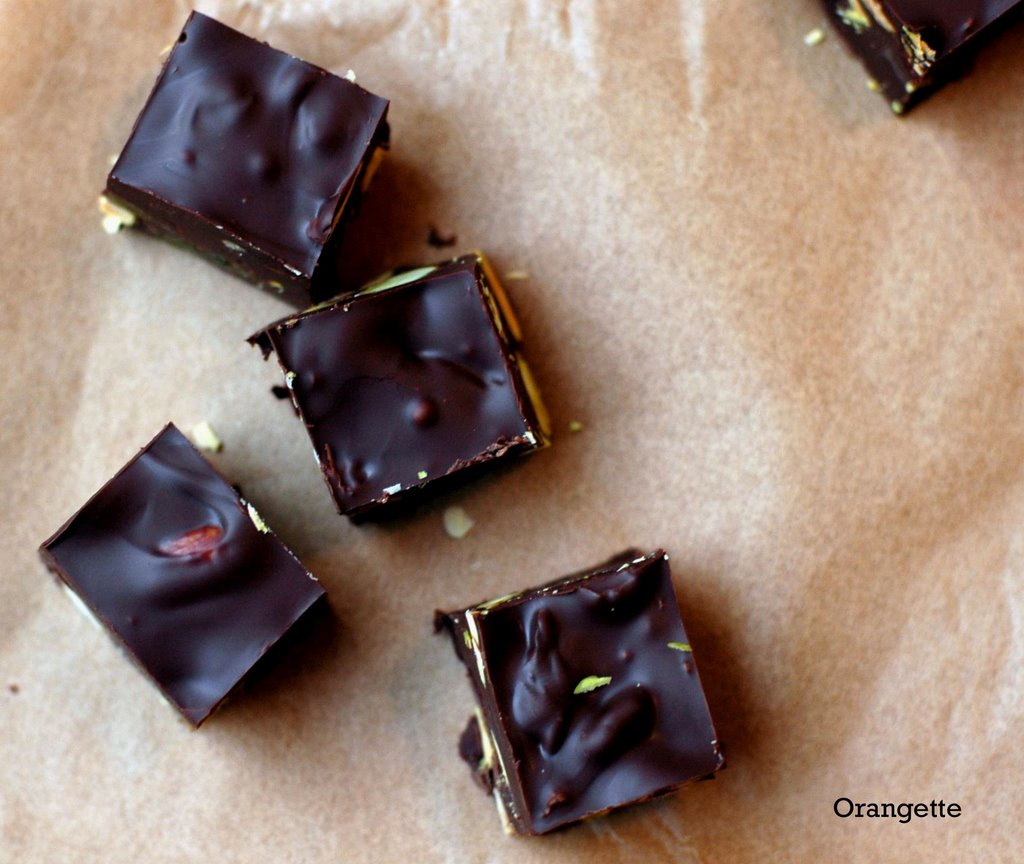
Gourmet calls these candies “Fruit and Nut Chocolate Chunks,” but I like to think of them as chocolate “blocks.” They remind me of a child’s building blocks, squat and solid, but etched with appealing flecks of fruit and nuts rather than the boring old alphabet. With a set of these in my toy chest, I could have built my childhood forts from something much tastier than blankets and chairs and poster board, and oh, how popular I might have been! But later is always better than never, I believe, and so it goes with these. They’re made for an adult’s palate, anyway, with a dark, refined flavor that - by way of some mysterious fruit-cacao alchemy - hints at wine and liqueur and fancy chocolate truffles. They’re almost better than my weekend, and I don’t say that lightly. They’re one for the cookie tin.


Chocolate “Blocks” with Fruit and Nuts
Adapted from Gourmet, February 2003

Be sure to choose a chocolate whose flavor you love, because it’s the main player here. I can think of any number of excellent brands, but for the sake of affordability – goodness knows most chocolate ain’t cheap – I went with a few bars of Ghirardelli 60%. It’s not particularly fancy, but it is relatively easy on the wallet and has a very true chocolate flavor. Also, for the pistachios and peanuts: you can use either salted or un-, but bear in mind that chocolate and salt make very happy bedfellows, so if you have the salted kind, by all means, use it. I used salted peanuts and unsalted pistachios because that’s what I had on hand. And lastly, for the fruits: if you, like Brandon, feel a little nauseous at the thought of chocolate and raisins, feel free to substitute another fruit instead. Dried cherries would be lovely, I’ll bet, as would chopped dried apricots.

1 ¼ lb good-quality bittersweet chocolate, finely chopped
Vegetable oil, for greasing the pan
2/3 cup dried cranberries
2/3 cup raisins
2/3 cup roasted, shelled pistachios, salted or unsalted
2/3 cup roasted peanuts, salted or unsalted

In the top of a double boiler or a metal bowl set over a saucepan of barely simmering water, melt the chocolate, stirring occasionally until smooth.

While the chocolate is melting, line the bottom and sides of an 8-inch square baking pan with foil, leaving a 2-inch overhang. Using a pastry brush, lightly brush the foil with vegetable oil.

When the chocolate is melted, remove it from the heat, and stir in the fruit and nuts. Pour the mixture into the prepared pan, and spread it evenly with the back of a spoon or rubber spatula. Place the pan in the refrigerator, and chill for about an hour, or until the chocolate is firm. [I chilled mine for exactly one hour and found the chocolate to be the perfect temperature for cutting - not too hard and not too soft. If it’s too hard, the chocolate will shatter under the knife, and you’ll have trouble getting a clean cut.]

Use the foil overhang to lift the chilled chocolate mixture from the pan, and place it on a cutting board. Peel back the foil, and cut the chocolate into whatever size you desire. I like mine in rough 1-inch cubes.

Note: These candies keep in the refrigerator, sealed in an airtight container with foil between the layers, for up to two weeks.

Yield: About 60 1-inch cubes

lunes, 11 de diciembre de 2006

Menu for Hope

Dear readers:

I know that you have come here today expecting some cookie talk, but I hope you won’t mind if I mix things up a little, just for a minute. The cause is a very good one, I promise.

Today is the opening day of the annual Menu for Hope charity raffle, the brainchild of lovely and benevolent food blogger Pim. Last year, the raffle raised an impressive $17,000 for UNICEF. This year, we aim to raise even more, with all proceeds going to the United Nations World Food Programme. For those of us who take great pleasure in food and cooking, this is a small, fitting way to help those less fortunate. For a mere ten dollars a ticket, you can help someone in need get a nutritious meal – and maybe get yourself a nice raffle prize, to boot. I don’t know about you, but that sounds pretty darn good to me.

Plus, look at those prizes! I hardly know where to start – I want every last one of them. But if I were you – not to be pushy or anything – I’d put my money on one in particular: a chewy, delectable thing that comes from my own kitchen and that Brandon has dubbed, entirely without prompting, “the best cookies, anywhere, EVER.” [You know, of course, that he does exaggerate, but he’s usually right.]


Just think: a dozen chocolate-capped coconut macaroons, lovingly made by yours truly and delivered to your very door! These little beauties never fail to please. A colleague to whom I recently gave a Tupperware of these actually moaned with each bite and then, quite tellingly, held the container to her chest for the remainder of the day. Another friend has taken to calling them “little lumps of heaven.” [I, of course, do not exaggerate.]

I will bake the macaroons to order, topping them with a rich ganache of organic cream and Valrhona chocolate, and I then I will send them via overnight mail to any location – that means you! – in the continental United States. [Sorry, no international or overseas shipments.] Sure, you could hunt around in my recipe archives and make them for yourself, but wouldn’t you rather let me do it? And give some money to a good cause, rather than your local Safeway? I thought so.

Here’s what to do:

1. Go to the donation page at First Giving.
2. Make a donation. Each $10 will give you one raffle ticket toward a prize of your choice. When confirming your donation, please specify which prize (or prizes) you’d like in the “Personal Message” section of the donation form. Be specific: state how many tickets you’d like to put toward each prize, and please use the prize code. My code is UWO6. Don’t forget that! Without that code, you can’t direct your ticket to my macaroons, and that would be terrible.
3. If your company matches your donation, please remember to check the box, and fill in the necessary information so that we can collect those funds too.
4. Should you win, we will need to contact you, so please also check the box to allow us to see your e-mail address. It will not be shared with anyone.
5. Winners will be announced on January 15. In the meantime, hope and wait.

To see other prizes offered by us West Coasters, hop over and visit Sam. And thank her for her hard work.

I’ll be back tomorrow with another treat for the ole tin. In the meantime, you know what to do: donate. Please.

lunes, 4 de diciembre de 2006

Hop to it

The sun set at 4:18 this afternoon. That means that the street lamps outside my office window shuddered ominously to life at ten minutes after three, people. Six o’clock this evening was indistinguishable from midnight. I don’t know how it is where you are, but around here it’s very, very dark.

When Brandon moved to Seattle last June, he was more than a little apprehensive of all this, and with good reason. No sane person moves to “The Rainy City” – or, more fittingly, “The Rainy and Really, Really Dark City” – without some reservations. I tried to soothe him with the usual consolations – it doesn’t really rain so much as sort of mist, and I mean, hey, have you seen our summers? – but he wasn’t convinced. I really tried, fellow Seattleites, but it’s not easy to find nice things to say about our wet, stumpy days and long, loooong nights. I guess we all have to live them for ourselves, and make our own peace with clouds and damp ankles.

As for me, there is just one thing that keeps my head above water – no pun intended, I swear – through these soggy, sloppy months: the kitchen. (That, and the sheer force of will to survive to see next summer.) I mean, hell, when nighttime starts in the late afternoon, how else is a girl supposed to while away the bleak, inky hours? With a pot of soup, that’s how – or a slow braise, or some butter cookies scented with the cheering zest of this season’s “it” citrus, the Meyer lemon. In the end, you know – and at the holidays – it always comes back to cookies.


If you haven’t bought a Meyer lemon yet this year, consider these your marching orders. As my dad used to say, hop to it! And while you’re at it, make sure that your stock of butter, flour, and sugar is in good shape. You have Christmas presents to bake, by god. And – lucky you! – this particular present makes a batch big enough for giving to friends far and wide, and for eating straight from the sheet pan too. It also makes a long, pitch-black night pass pretty painlessly.

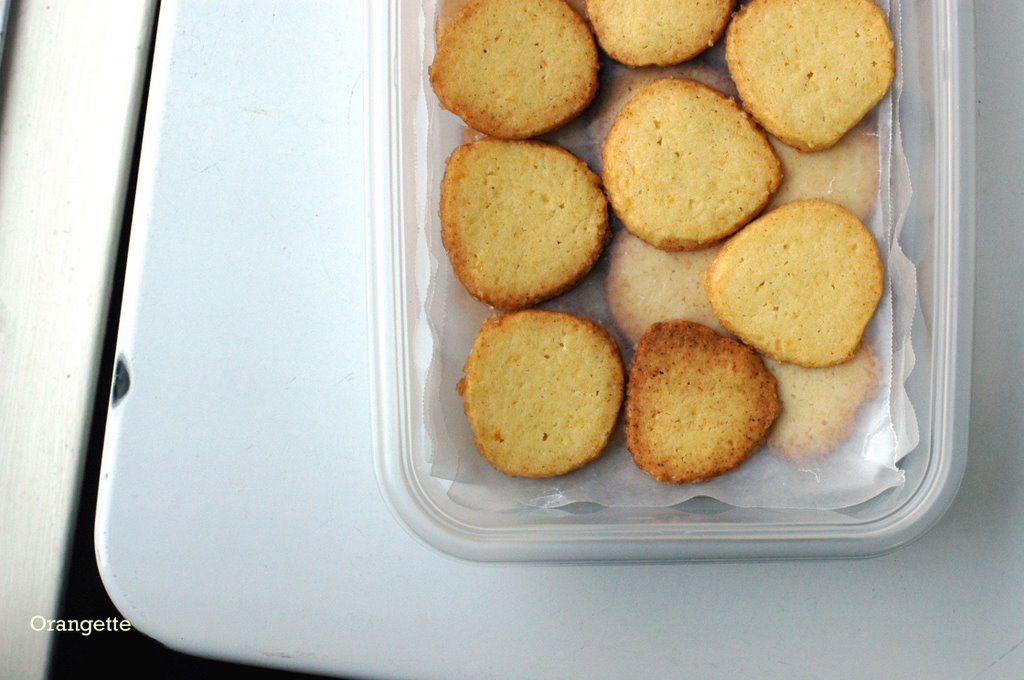
What we have here is basically a French-style shortbread, called a sablé, or “sandy” cookie, for its fine, crumbly texture. This particular specimen, however, gets a gussied up for the holidays, with a sugar collar and a spritz of zest from a Meyer lemon. The hybrid cross of a regular lemon and a mandarin, Meyer lemons are sweeter and less tart than a typical supermarket lemon, with a complex, floral aroma that feels mysterious and familiar at the same time. Mixed into a batter and baked, their zest blooms into a delicate, spicy scent that fills the room, and a flavor that makes these cookies damn near impossible to stop eating. With an edgy tinge of salt and a bit of textural intrigue from Turbinado sugar, these will have a space in my Christmas cookie tin for years to come – assuming, of course, that I can get them packed safely away and into the freezer before I eat them all.


And as for those dark nights and clammy days, well, it’s no coincidence, I think, that on the very day I baked these cookies, Brandon turned to me and said, quite out of the blue, “You know, winter here really isn’t bad at all.”


Meyer Lemon Sablés
Adapted from Amanda Hesser’s Cooking for Mr. Latte

I am not ordinarily drawn to such a plain, humble-looking cookie, but after baking these fragrant, buttery lovelies, I am officially reconsidering my ways. They’re good. With their subtle citrus flavor and crisp, shortbread-like texture, they would sit beautifully, I imagine, next to a cup of tea. And as we found last night, they happily team with a glass of sauternes to make a soft, gentle finish to a hearty winter meal.

About the Meyer lemons: if you can’t find them in your local market, you could certainly use a regular lemon here – no sweat. And Brandon also thinks that the zest of another winter citrus would work nicely in these too – maybe a tangerine, Satsuma mandarin, or good ole navel orange?

2 cups unbleached all-purpose flour
2 tsp baking powder
2 sticks (1 cup) unsalted butter, at room temperature
½ cup confectioner’s sugar
½ cup granulated sugar
2 Tbs finely grated Meyer lemon zest (from about 2 good-size fruits)
¾ tsp coarse sea salt or Kosher salt
4 large egg yolks
¼ cup coarse Turbinado sugar, for rolling logs of dough

In a small bowl, combine the flour and baking powder, and whisk to mix thoroughly. Set aside.

Put the butter into the bowl of a stand mixer (or a large mixing bowl). Beat (with the paddle attachment, if you’re using a stand mixer) on medium-low speed until the butter is creamy; then add the confectioner’s sugar and beat for a minute. Add the granulated sugar, and beat for a minute more. Sprinkle the lemon zest and salt into the bowl, and mix briefly to just combine. Add the egg yolks one at a time, mixing briefly to incorporate after each addition. With the mixer on low, add the flour in three doses, mixing just until the flour is absorbed. Use a rubber spatula to do any last scraping and stirring; do not overmix. The dough will be quite thick and dense and sticky.

Divide the dough between two large sheets of wax paper. Using the paper as an aid, smoosh and roll and shape one blob of dough into a rough log about 1 ½ inches in diameter. Roll up the log in the paper, and twist the ends to seal it closed. Repeat with the remaining blob of dough. Chill the two logs until the dough is cold and firm, at least two hours and up to a couple of days.

When you’re ready to bake, preheat the oven to 350 degrees Fahrenheit, and set a rack in the middle of the oven. Line a baking sheet with a silicone mat or parchment paper. Put a large sheet of parchment paper on the counter, and pour the Turbinado sugar onto it, making a ridge of sugar approximately the length of the dough logs. Remove a log from the fridge, unwrap it, and roll it lightly in the sugar to press the crystals into its sides. Coat the log as thoroughly as you can; then slice it into ¼-inch-thick slices. [I found that a thin paring knife works well.] Lay the slices on the baking sheet, leaving about 2 inches between each cookie. Refrigerate the remaining dough.

Bake the cookies for about 10-12 minutes or until just golden around the edges, rotating the sheet 180 degrees halfway through the baking time. [Keep in mind that the cookies will continue to brown a bit after you have removed them from the oven, so it’s best to err on the pale side.] Cool them on the silicone mat or parchment paper on a wire rack. Repeat with remaining dough.

Store the cookies in an airtight tin at room temperature for up to three days, or freeze them in a Tupperware, with a sheet of wax paper between each layer.

Yield: about 80 silver-dollar-size cookies

martes, 28 de noviembre de 2006

To my heart's content

Whew. You know that saying about the month of March? That it comes in like a lion and goes out like a lamb? Well, I think November is the exact inverse. It comes in on its tiptoes, with a faint, flirty rumor of fall and a clove-scented hint of the holidays to come, and it goes out all a-bluster, with sleet and snow and rosy cheeks (in Seattle, anyway) and a full-on assault of all things Santa Claus. Part of me wants to hunker down and hide away for a month or so – hibernate, bear-style, with a teapot and a down pillow – but the other part of me couldn’t be happier. After all, this time of year is tailor-made for cookie baking: loads and loads, pan after pan, cookies for eating, cookies for giving, cookies to my heart’s content. Oh, happy, happy holidays.

I’ve never been a big fan of Christmas shopping. It always feels sort of forced and messy, and more about the wallet than anything else. I love the idea of Christmas presents – I am human, you know – but when it comes to procuring them, my feelings are mixed. The mall doesn’t exactly help matters. The problem is this: I don’t so much want to buy. I want to make – or, more precisely, bake. What makes me happy at the holidays – or any day – is the homemade and the handmade, things with history and character. So this year, I have made a decision: to give only gifts made by hand,* with no exceptions. [Okay, except a few books, maybe, because they’re books, people, and that doesn’t count.] I’ve done a little baking and canning for past Christmases, but this is my first year to go whole-hog handmade. It may sound a little daunting, but to me, it sounds just like heaven. It sounds like lots and lots of cookies. I hope you’re ready.

Now, there will be some apple butter, I’m sure, and some fruit-nut balls with floppy chocolate caps, and maybe even some coffee-walnut toffee. [I am turning into my mother, I know, and I don’t mind one bit.] But the next few weeks mainly spell good, solid, quality time for me and my oven. I’m always itching to bake a pan of cookies, so you can imagine how happy this makes me. Unlimited excuses for creaming butter! Sugar by the bag! And, thanks to the first cookie on my list – fittingly named “chocolate rads” – pound after radical pound of cocoa-rich bittersweet chocolate.


I was reminded of this recipe last weekend at City Bakery, while downing one of three “melted” chocolate chip cookies I tucked away over the course of three days in New York.** [It would have been a real shame, you know, to let a day go by without eating one.] Dark and crackly-topped, Maury Rubin’s chocolate-on-chocolate confection was not only worthy of the trip from Seattle, but it also called to mind a cookie that made regular appearances in my mother’s annual Christmas tin. Her version came from an old Bon Appétit recipe, a straightforward formula that called for both bittersweet chocolate and chocolate chips, as well as instant espresso for oomph and cake flour for a dainty, melting texture. It was, I remembered, rip-roaring delicious.

So on the plane ride home, I started scheming, and within 18 hours of our landing at SeaTac, a batch of chocolate rads sat cooling on my countertop. Tender to the core, like a dense sort of cake, these little beauties are a chocophile’s dream. Like small, tidy brownies encased in crisp, crinkly shells, they quite literally ripple with chocolate. And best of all, they keep for a few weeks in the freezer, which makes them pretty darn ideal for us Christmas bakers. It’s not even December yet, but ooh boy, is this heart ever content.

* This doesn’t mean that I won’t be buying a few things here and there - just that those few things will be handmade. The Internet is brimming with artists and crafters whose work is very, very worthy of Christmas giving. Here are a few of my favorites, a little sampling of people who make me feel especially happy about going handmade this year:

Jen Causey
and her inspiring camera
Lisa Solomon
and her totes and tees and more
Maria Vettese
and her lovely letterpress (nudge! nudge! the card society, anyone?)
Blair Stocker
and her wise.. crafting
Camilla Engman and her beautiful work


** A celebratory weekend after my successful first go at roasting a turkey (phew!). New Jersey, you were kind to me.


Chocolate Rads
Adapted from Bon Appétit a while back

These cookies are all about the chocolate, so don’t skimp. You want these to be, uh, rad, you know. It may be a tad expensive, but buy the good stuff.

1 pound bittersweet chocolate, chopped
1 ¾ cups granulated sugar
4 large eggs
4 Tbs unsalted butter, melted and cooled slightly
1 Tbs pure vanilla extract
1 tsp instant espresso, such as Medaglia D’Oro
½ cup cake flour
1 tsp baking powder
¼ tsp salt
2 cups good-quality semisweet chocolate chips, such as Ghirardelli

In the top of a double boiler or metal bowl set over gently simmering water, melt the bittersweet chocolate, stirring until smooth. Remove from heat, and set aside.

In a large bowl, combine the sugar and eggs, and beat with an electric mixer until thick and pale yellow, about 3-5 minutes. Add the melted chocolate, melted butter, vanilla extract, and espresso powder, and beat to mix thoroughly.

Sift the flour, baking powder, and salt into small bowl. Add the dry ingredients to the chocolate mixture, and stir with a rubber spatula to just combine. [The batter will be fairly gluey and thick.] Stir in chocolate chips. Place the bowl in the refrigerator, and chill until the batter is firm but not too hard, about 30 minutes.

Preheat the oven to 350 degrees Fahrenheit. Line two large cookie sheets with parchment paper. Drop the batter with a spring-loaded ice cream scoop – mine has a capacity of 2 tablespoons per scoop – onto the prepared sheets, leaving about 2 inches of space around each blob of dough. With moist fingertips, press down on each blob to flatten it slightly. Bake the cookies until tops look dry and crackled, about 11-13 minutes. Do not overbake. Transfer the cookies on the parchment paper to a wire rack, and allow to cool completely. Repeat with remaining dough. Remove finished cookies from the parchment paper, and store them in airtight container.

Note: These cookies freeze beautifully, and they can be frozen for up to a month. Allow them to come to room temperature before serving or eating.

Yield: About 35-40 cookies

lunes, 20 de noviembre de 2006

Combine-and-boil

Now, I know I’m really pushing the limits here, with less than 72 hours until the big day, but I just can’t let another year sneak by without sharing one of my favorite parts of the Thanksgiving spread. I hope I’ve caught you in time. Hurry - before you read another word, jot this on your grocery list:

apricot preserves
white distilled vinegar
raspberry preserves
ground cloves
Grand Marnier
fresh cranberries
crystallized ginger
dried tart cherries

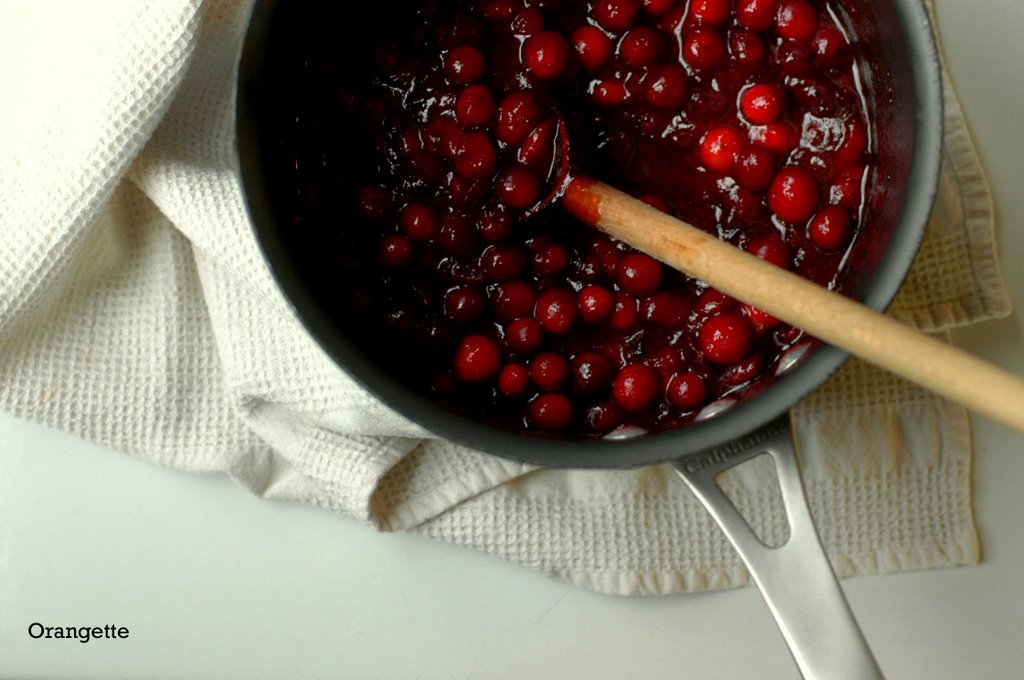
That task complete, you’re over halfway to having a bowl of this kicky, warming, sweet-tart stuff on your table. This cranberry chutney is basically a combine-and-boil job, but you’d never know that by its complex, knee-buckling flavor.


My mom has been making this recipe for, oh, at least ten or 15 years. I’m hard-pressed to think of a Thanksgiving when we haven’t eaten it. Mom doesn’t remember where she first found the recipe, which is written in her handwriting on an old slip of paper. But in any case, we have been making it for long enough – and I have tweaked it enough – that it now really feels like ours. I remember many a Thanksgiving afternoon spent standing around the butcher-block island in our kitchen, with my dad on one side, blending cranberries and oranges into a raw relish, and my mom on the other, stirring a pot of this chutney on the stove. Come dinnertime, I would mound a spoonful of each on my plate, alternating raw and cooked with each bite of turkey. But the next day, when the time came for a leftover turkey sandwich, it was always the Tupperware of chutney that I turned to first, with its soft, juicy cranberries, winy dried cherries, and spicy bits of ginger. I would slather the ruby conserve onto a slice of whole wheat bread, top it with a fanned-out layer of turkey, and finish with a second slice of bread. Mayonnaise was optional; my mom spread her second slice with a thick smear, but I studiously avoided the stuff. Either way, that was how we did Thanksgiving, and its leftovers too.


This year, I’ll be toting a Tupperware full of cranberry chutney to Brandon’s family in New Jersey, where I will - [deep breath] - roast my very first turkey without maternal guidance. Lord help me. At least the chutney is a sure thing - that, and the fact that my mother is only a phone call away.

Happy Thanksgiving, friends.


Cranberry Chutney with Crystallized Ginger and Dried Cherries

This chutney is, of course, delicious with turkey, but it also takes kindly to being heaped on the back of a buttered biscuit. We have also tried a spoonful of it in a bowl of sweet potato soup, and it was surprisingly delicious. [Thank you, Dan and Shauna, for giving Brandon such a brilliant idea.] And it also makes a lovely, wintry appetizer atop a crostini smeared with fresh goat cheese. Oh, cranberry chutney, the places you’ll go!

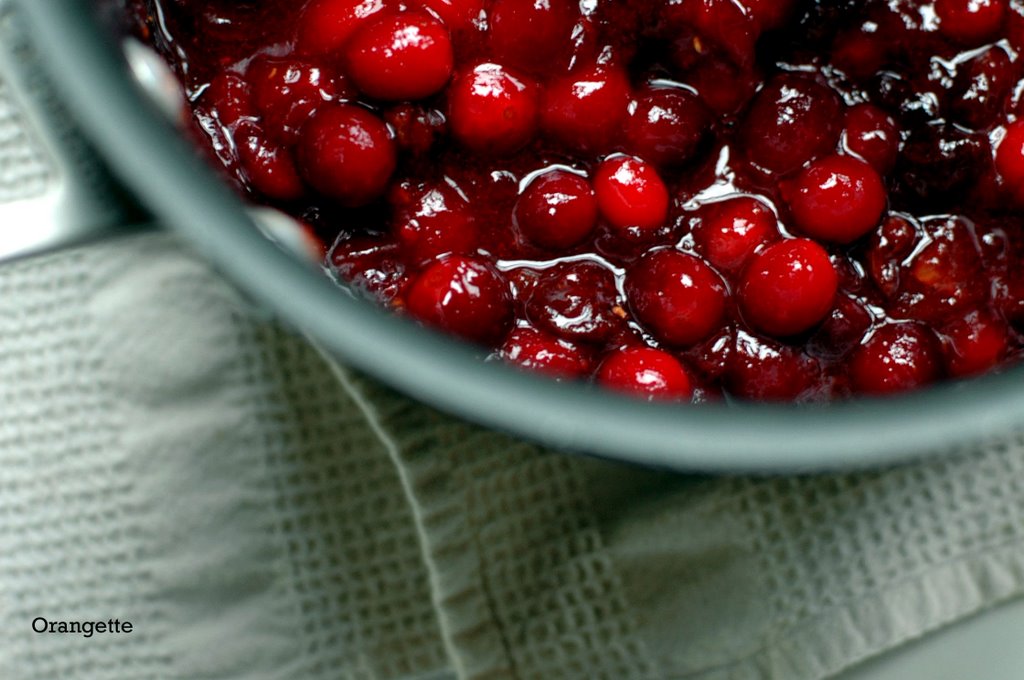
A few notes about ingredients: the original recipe calls for raspberry vinegar, which Brandon tells me is “so ‘80s,” and anyway, most brands of the stuff are sort of gross. If you have some in your pantry, feel free to use it here; otherwise, do as we did and simply substitute a mixture of white distilled vinegar and raspberry preserves. It does the trick just fine. As for the dried tart cherries, Trader Joe’s sells them quite cheaply, and they’re very tasty. And about the cranberries: be sure to pick through them carefully and discard any rotting, mushy, or generally icky ones. There is usually a good handful, if your experience is anything like mine. Lastly, note that this chutney reaches its thick, jammy, finished consistency only as it cools, so it will still be somewhat loose when you first remove it from the heat. The photographs above were taken when mine was still on the runny side, only a few minutes after I had pulled it from the stovetop. Yours will look quite a bit thicker when it is fully cooled.

24 ounces apricot preserves
¾ cup raspberry vinegar, or ¾ cup white distilled vinegar plus 1 ½ tsp raspberry preserves
A pinch of salt
¼ tsp ground cloves
¼ cup Grand Marnier
2 bags fresh cranberries, nasty ones discarded
½ cup finely chopped crystallized ginger
1 ¼ cups dried tart cherries

In a large, heavy-bottomed saucepan, combine the apricot preserves, raspberry vinegar (or vinegar and raspberry preserves), salt, cloves, and Grand Marnier. Stir to mix, and place over medium-high heat. Bring the mixture to a boil, and continue to cook – it will bubble aggressively, and you should stir regularly to keep it from scorching – for about 10-15 minutes, or until it has thickened slightly. Reduce the heat to medium, add the cranberries, and cook until they are soft but not popped. [I know that they’re ready when I hear one or two of them pop; that’s a good indicator that most of them must be getting pretty soft.] Add the ginger and cherries, stir well, and remove from the heat. Cool completely before serving. The chutney will thicken considerably as it cools.

Yield: 8-10 servings